How to create a Google Form
Last updated September 2026 · ~9 minute read
Short answer: Go to forms.google.com and click Blank form — or from Drive, New → Google Forms. Name it, click Add and choose a question type, check Settings, then — and this is the step most guides still get wrong — click Publish at the top right. There is no Send button on the editor any more. Google is explicit: “If the form is unpublished, responders with the link can't access it.”
Creating the form is the easy half. The half that wastes an afternoon is discovering, after you have sent the link to forty people, that the form was never published — or that you left a setting on that quietly forces everyone to sign in. This guide goes from a blank form to a live link, in the order the editor actually asks for it, with Google's own wording quoted where it matters.
Step 1 — Open a blank form
Google documents three routes to a new form, and they all land in the same editor:
- From Forms. “Go to forms.google.com”, then “Click Blank form”.
- From Drive. “On a computer, go to drive.google.com”, “In the top left, click New” and then Google Forms. Use this one when you care where the file lands — the form is created in the folder you are looking at.
- From Sheets. “On a computer, open a spreadsheet at sheets.google.com”, “Click Tools” and then Create a new form. The new form arrives already linked to that spreadsheet, which saves a step if a sheet is where the answers are going anyway.
You will see docs.google.com/forms quoted as a fourth route in a lot of articles. Google's
own “How to use Google Forms” page does not document that address, so we are not going to pretend it is an
official step — the three routes above are the ones Google publishes.
Starting from a ready-made layout instead of a blank page is a different job with different trade-offs, and it has its own guide: Google Forms templates.
The Sheets route is the one that causes the most confusion, and it has its own guide too: Google Forms vs Google Sheets forms.
Step 2 — Name it before you forget
A new form is called Untitled form until you rename it. That name is three things at once: the Drive filename you will search for later, the heading responders see at the top of the form, and the default subject line if you end up emailing it. Rename it first, then add a description underneath saying what the form is for and roughly how long it takes — the single cheapest thing you can do for your completion rate.
Step 3 — Add your questions
Google's steps for a question are short enough to quote in full:
- “Open a form in Google Forms.”
- “Click Add” — the plus button on the floating toolbar beside the form.
- “To the right of the question title, choose the type of question you want.”
- “Type the possible responses to your question. To prevent people from not answering, turn on Required.”
Note what Google does not do there: it never gives the question-type control a name. It is described only as the place where you “choose the type of question you want”, to the right of the question title. Articles that call it the “question type dropdown” are describing it, not quoting a label — so if you are hunting for a menu item by that name, stop hunting and just look to the right of the title.
A few question types have enough of their own behaviour to be worth reading up on before you commit to them: file upload forces responders to sign in and eats your Drive quota, and signatures are not a native type at all.
Step 4 — Break long forms into sections
Google's line is that “Sections can make your form easier to read and complete”, and the steps are “Click Add Section” then “Name the new section”. Sections are also the unit that branching works on, so if you want a form that shows different questions to different people, the section is what you will be sending them to — see conditional logic in Google Forms.
Step 5 — The step most guides still get wrong: Publish, not Send
If you learned Google Forms before 2025, the last step was a blue Send button at the top right. It is gone. The editor's top-right button is now Publish, and until you press it the form is a draft that nobody else can open. Google's help page states it plainly:
“When you publish a form, responders can access it. If the form is unpublished, responders with the link can't access it.”
The flow Google documents is Publish → Manage → Publish:
- “At the top right, click Publish.”
- “To select who can respond to the form, click Manage.” This is where you decide between anyone with the link and a named set of people or groups.
- Confirm with Publish — or, if you have added named responders and ticked “Notify these responders”, with Publish and notify.
Then take the link: “Once you publish the form, click Published and then Copy responder link.” Before publishing, the same page tells you that link lives behind Preview — which is the trap. A link copied out of a draft looks like a perfectly good link and is not one.
So where did Send go?
It still exists, one level down. If you share the form with named people rather than by link, Google's steps are “click Share”, “Enter the names of the people or groups”, set their access to “Responder”, and then “Click Send.” That is the confirm button inside the Share dialog — not the publish action, and not the thing that makes the form live. Publish makes it live; Send hands it to specific people. The full set of sharing routes, including the shortened forms.gle address, is in how to share a Google Form, and putting it on a page instead is covered in embed a Google Form on a website.
What to set before you share it
All of these live in the same place: “At the top, click Settings”, then, for the response options, “Next to ‘Responses,’ click the Down arrow.” Three of them change who can answer and how, so decide them before the link goes out rather than after.
- Email collection. Whether you record who answered — and whether the form therefore requires a Google sign-in. It is also the setting people get wrong when they want the opposite: how to make a Google Form anonymous covers what each option does and what it does not guarantee.
- One response per person. “Turn on Limit to 1 response.” Google's tip attached to it is the catch: “To access and fill out the form, users must sign in to their Google Account.” There is no anonymous version of this setting. See limit responses on Google Forms.
- Response editing. “Turn on Allow response editing” if people should be able to come back and change an answer they have already submitted. Off by default, and impossible to grant retroactively in a useful way once answers are in — more in seeing and managing responses.
Two more worth a thought at this stage: if this is a graded form, turn on quiz mode now rather than after the answers arrive (make a quiz on Google Forms), and if you want to know when someone answers, set that up before you share (email notifications for Google Forms). If the form should stop accepting answers on a date, Forms has no built-in scheduler — scheduling a form to open or close explains the routes that do work.
How big can a form get?
Google gives two numbers, and they are worth knowing before you design something enormous:
“After you've created a form, you can add and edit up to 300 pieces of content, like questions, descriptions, images, and videos. To organize your form by topic, you can add up to 75 sections.”
Read “pieces of content” carefully. It is a combined budget: every description block, every image and every video is spending from the same 300 as your questions, so a heavily illustrated form runs out sooner than you would guess from the question count. The separate question of how many answers a form can take is a different limit entirely, and a much more commonly misquoted one — Google Forms response limits has the real numbers.
Which route should you start from?
| Your situation | Start here |
|---|---|
| At a computer, nothing special needed | forms.google.com → Blank form |
| The form must live in a specific Drive folder | drive.google.com → New → Google Forms |
| The answers are going into a sheet you already have | sheets.google.com → Tools → Create a new form |
| You want a layout rather than a blank page | The template gallery |
| You only have a phone or iPad | Forms+ — a native editor on your own Google account |
| You have the questions on paper already | Scan the paper form in |
Creating a form without a computer
Every step above assumes the desktop web editor, because that is what Google's documentation assumes. Google ships no Google Forms app for iPhone or iPad, so on a phone the official answer is the mobile web editor — workable, but not built for building.
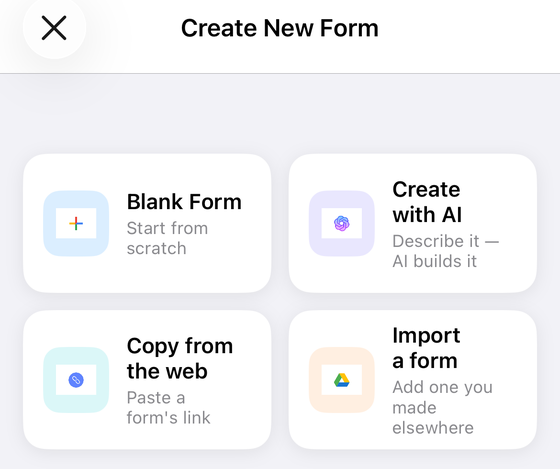
Forms+ is a native iOS client for your real Google Forms, on your own Google account and built on the official Google Forms API. It opens on your Drive with a Create a form button and an empty state that reads “Tap on the + button to create a new form” or “Import an existing one from your Google Drive”, so a new form is one tap from launch. It has a Manage access screen — “Choose who can respond to and co-edit your form”, split into Responses, Access and Links — which is where publishing, the Accepting responses switch and Copy edit link live. And if you keep building the same kind of form, it saves your own templates: “Tap a template to create a new form from it. New forms are full copies — editing one doesn't change the template.”
More on what it does and does not replace: Google Forms app for iPhone.
Build the form on the device you actually have
Forms+ creates, edits and publishes real Google Forms from iPhone and iPad — your own account, your own Drive, no re-typing anything into a copy.
Get Forms+ free on the App StoreFrequently asked questions
How do I create a Google Form?
Google documents three routes: go to forms.google.com and click Blank form; go to drive.google.com and “In the top left, click New” then Google Forms; or open a spreadsheet at sheets.google.com and click Tools then Create a new form. Then add questions, check Settings, and click Publish.
Why is there no Send button in Google Forms any more?
The top-right button is now Publish. Google's help page describes clicking Publish, using Manage to “select who can respond to the form”, and confirming with Publish. Send still exists, but only as the confirm button inside the Share dialog after you have typed in names or groups.
Do I have to publish a form before people can answer it?
Yes. Google states: “When you publish a form, responders can access it. If the form is unpublished, responders with the link can't access it.” A link copied out of a draft is not a working link.
How many questions can a Google Form have?
Google states you can add and edit up to 300 pieces of content, “like questions, descriptions, images, and videos”, and that you can add up to 75 sections. The 300 is a shared budget, not 300 questions on top of everything else.
Can I create a Google Form on my phone?
There is no Google Forms app for iPhone from Google, so the mobile web editor is the default route. Forms+ is a native iOS client that creates and edits real Google Forms on your own Google account, with a Create a form button and a Manage access screen for choosing who can respond.